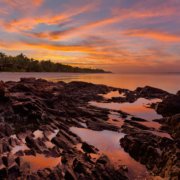
Getting started with Exposure Blending in Photoshop
Natural-looking high dynamic range (HDR) nature photography makes a viewer feel like they are looking out of a window at some exotic location. It is little wonder that these nature photos take your breath away and make you dream about quitting your daytime job and going travelling. We use manual exposure blending in Photoshop to create nature photos with high dynamic range.
However, the experienced landscape photographer knows that exposure blending in Photoshop is not an easy task to accomplish. Not only do you have to bracket your camera exposure, but you also must be able to process these bracketed camera exposure to make them look natural.
Exposure Blending for Landscape Photography
There are two effective ways to create stunning natural looking high dynamic range landscape photos.
HDR Photography
HDR (High Dynamic Range) photography refers to the automated process of blending multiple camera exposure using a Lightroom or a dedicated HDR software. Landscape photographers do not have to worry about creating layers and masks to blend the bracketed exposures. HDR photos produced by automated software often requires additional adjustment to create natural looking photos.
Manual Exposure Blending in Photoshop
This is a manual process for creating high dynamic range photos Exposure blending Photoshop requires a landscape photographer to create layers & mask to blend the bracketed camera exposure. Most pro photographers rely on this technique to create high dynamic range images because this manual process gives them ultimate control over the final result.
Because exposure blending in Photoshop has a steep learning curve, beginner landscape photographers are often reluctant to embrace this approach. If you are just getting started with exposure blending Photoshop, here are some of the common mistakes that you should try to avoid:
Unnatural tonal gradation in Photoshop
Because most manual exposure blending workflow use layers and masks in Photoshop, it is easy to end up with an unbalanced high dynamic range photo which does not match the light conditions on the scene. One of the common mistakes that a beginner landscape photographer makes is to add too much details in the highlights.
For the above example from Maui, Hawaii (Image #1) shows how these unnatural tones can appear in a manual exposure blending workflow in Photoshop. You can see that the highlights around the sun are much darker than what was visible with the naked eye. When you are looking directly at the sun, it’s almost impossible to see all the detail and colors in the immediate vicinity of the setting sun. Additionally, the light reflecting from the water is much brighter than the sky. Image #2 shows a natural looking exposure blending in Photoshop where the highlights show the bare minimum details.
Over-processed HDR Photography
We have all seen the over-cooked HDR photography look where a landscape photographer desperately tries to create a high contrast. It is easy to find examples of over-processed landscape photos created with automated HDR photography software. But, if you’re not careful, you can also over-process a photo using a manual exposure blending in Photoshop workflow.
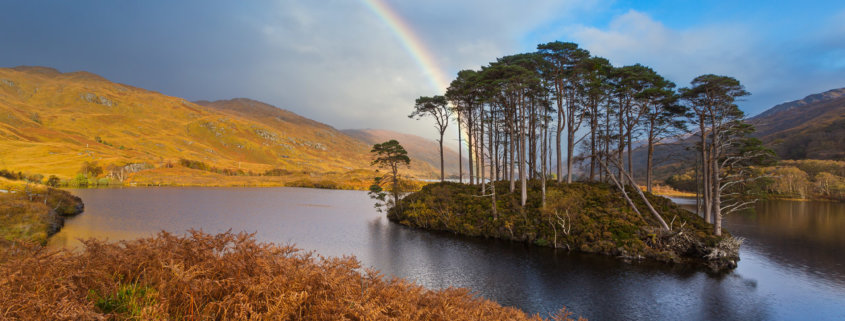
Don’t get me wrong. There is nothing wrong with creating an artistic landscape photo with the over-processed HDR look. However, if you want your landscape photos to look natural, it is best to avoid adding too much contrast in Photoshop. Image #1 from Scotland shows a high dynamic range image with over-processed HDR look that was created using Photoshop Layers & Masks. For image #2, I was able to use exposure blending in Photoshop workflow to create a stunning natural looking landscape photo.
Adding unwanted artifact during Exposure Blending
Manual exposure blending in Photoshop is prone to halos, edge distortion, ghosting and other unwanted artifacts. Some of these unwanted artifacts introduced during the exposure blending workflow are readily visible. While others may require you to zoom into your image at 100% to see them.
One of the best places to find unwanted artifacts is near a high contrast edge as seen in Image #1 below. Image #2 shows a halo around a high contrast edge in the landscape photo captured in Glacier National Park, Montana. Ghosting in manually exposure blending workflow occurs when you have moving elements in your scene or if the images are not perfectly aligned. Pro landscape photographers use luminosity masking and smooth edge transitions to avoid unwanted artifacts during the exposure blending in Photoshop.
Exposure blending workflow in Photoshop give you incredible control over your blending process using layers and masks. You can also Photoshop layers & masks to make further refinement to your final image as seen in the example below.
Simple Exposure Blending in Photoshop Example
Here is an landscape photo from St. Mary’s Fall in Glacier National Park. I used Photoshop layers and masks to blend two camera exposure and to fine tune to the photo to bring out the stunning details and colors in my finished image.

Landscape photography created with exposure blending in Photoshop using layers and masks – Glacier National Park, Montana
I used Adobe Camera RAW to process Image #1 (below) for the details in the rocks. Notice that in this image you cannot see any details in the highlights because they are overexposed. On the other hand the Image #2 is processed for the highlight in the rushing water. You can see incredible amount of details in this highlights, but the shadows are under exposed. I used Photoshop Layers and Mask to manually blend these camera exposures to create a natural looking image.
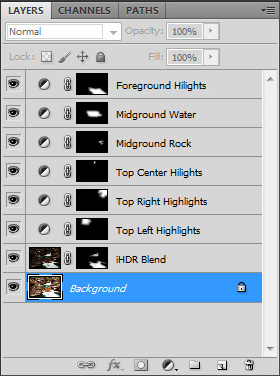
However, I noticed that the blended photo needed fine tuning to improve the contrast in the rocks, and to help focus the viewer’s attention on the St. Mary’s fall. I was able to use Photoshop Layers & Masks to accomplish this. Here are all the Layers and Mask in Photoshop to produce the final result:
Photoshop layers and mask gives me an ability for manual exposure blending as well as making other adjustment to the image as necessary. Furthermore, I can make these adjustments using a non-destructive workflow in Photoshop. I can turn Photoshop layers on and off to see exactly what effect they have on one another and on the final landscape photo. I can also refine layers and mask in Photoshop to correct my mistakes. I often save the image as a PSD file – with all those Photoshop layers and masks intact – and return to it a few days later to make final corrections with fresh eyes.
in summary, exposure blending using layers and masks in Photoshop allows me to have ultimate control over my final results. This workflow can also be extended to make further refinement to your photos to bring out the rich details and vibrant colors that you see in nature.

