6 Variables that Impact Colors in Landscape Photography
The vivid colors in nature exude life to me. I love seeing colors that are part of the natural surrounding areas that I’m exploring. For me, I want my photographs to convey what I see as well as how I feel about a particular scene. In this article, I will outline six variables that will impact colors for your landscape photography.
#1: Camera Exposure Settings
It’s important to get the exposure correct when setting up your images. If the photo is under or over exposed it could possibly ruin your image. You don’t want those beautiful colors within the scene to be washed out and become non-recoverable later in post processing. If you are bracketing your images, of course you’ll have images in the series that are both under and over exposed for the purpose of merging later in post processing. For the most part you want your images to be exposed correctly in camera, if possible.
One of the most important tools for exposure is the histogram. Always, check your histogram and don’t exclusively rely on your EVF or LCD screens. Looking through the viewfinder as well as checking your histogram will help you get the proper exposure. When looking at the histogram, the graph should be as close to the middle as possible. If it’s leaning too far left or right, you may have a problem. ISO, shutter speed and aperture changes may need to be adjusted if you are shooting in manual mode. I highly recommend composing your shot in manual mode, as it will give you more control over the image.

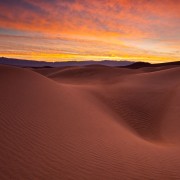
In this photo I used a circular polarizing filter. I also, made sure the image was exposed properly because it was a sunny day.
#2: Available Light
It’s always about the light in photography no matter what scene you are trying to capture. It’s possible to get great photographs in all kinds of lighting conditions. It definitely depends on your vision and what you want to capture from the scene in front of you.
Light can change in a matter of minutes and totally transform a scene into something with a little more pizazz.
The example below shows how the evening light above enhanced the red rock color in Sedona.
#3: Choice of White Balance
White balance can affect the warm or cool color tones in your images. I usually set my camera to auto for white balance but in some instances I will change it so it will warm up a scene. I often do this for photographing waterfalls or forest scenes. This will warm up the foliage colors getting it closer to what my eyes have seen rather than rely on the camera’s auto setting to decide that for me. This affects the jpeg preview of your image in the camera’s LCD screen but doesn’t affect the raw file. However, the white balance settings are stored in the meta data of the image. You can later make updates to the white balance during post processing.
The example below shows a photo I took in Bandon, Oregon during the blue hour. I changed the white balance to a cooler tone to make the blues pop a little more.
#4: Photography Composition
Finding compositions can sometimes be challenging, particularly if there are so many possibilities around you. I always recommend spending some time just exploring and looking. Don’t rush to snap a photo, spend time thinking about what you can compose.
I was recently going through my archives of images from when I first started photography. Composition was not my thing in the early days! I can’t believe I thought those images were good at one time. Just because the sky is exploding into a brilliant, colorful sunset and you take the picture, doesn’t make it a compelling image. Think about what will make a compelling composition beside the colors you see, and then determine what your image should look like.
#5: Photography Filters
As a landscape photographer, I’m almost always using some kind of filter on my lenses. My most used filter is the circular polarizing filter. I use it to cut the glare in all my waterfall and some of my seascape images. I also find them useful for enhancing the colors in a scene. For example, they can make the blues pop in the sky or bring out reflections on a beach. However, you do have to be careful with them as you can actually get light banding issues. You could also have portions of your sky get uneven color tones.
I also use neutral density filters quite often. Sometimes I stack one with a circular polarizing filter when taking photos of waterfalls. This, along with shutter speed settings will create a long exposure effect on the flowing water that makes the water appear silky.
Occasionally, I use a graduated neutral density filter (GND). I rarely find a scene that I choose to use one with. That’s just me. I know photographers that use them all the time. A GND filter is usually square or rectangular, with one portion clear and the other tinted. They are used to darken the brightest part within your composition so you can get the best exposure for the entire picture.
#6: Weather
Weather can play a big part in how colors impact a landscape photo. Here again it all depends on your goal and what type of scene you are looking to photograph. I often prefer going out in the rain to shoot waterfalls because I’m going to get the best colors from the scene. Overcast days, in my opinion, are best to bring out colors in your waterfall photos. Mossy rocks and forest greens will pop more without strong glare from the sun.
I hope these tips will help you when you are trying to get the most color in landscape photography.


You say you control white balance. Does that mean you don’t shoot RAW or do I not understand RAW? I thought if you shoot RAW, the colors are recorded as seen and then corrected or manipulated in post.
thanks
Kozmo
Hey Kozmo, thanks for your great comment and question. Perhaps I need to update that to explain that changing the white balance in camera doesn’t actually affect the raw file but it does record it in the meta data of the file. And definitely I shoot in raw for landscapes ;)